Content:
- Design features and types
- The simplest potato digger for a walk-behind tractor
- Technical solutions for lancet
- Production of a screen-type digger
- DIY fan potato digger
- DIY potato digger
- Drum potato digger with your own hands
- DIY vibrating digger
- DIY conveyor digger
- Homemade transporter potato digger for walk-behind tractor
A potato digger for a walk-behind tractor will help you quickly dig up potatoes in personal plots. Hand-made, it will not be inferior to factory counterparts, it will become a practical unit if you design everything correctly according to the diagram and drawings. Unlike purchased devices, it will cost much less. But here you need some knowledge in physics, and you also need to be creative in work so that the unit works even on loams of medium density, especially after a pouring autumn rain, when digging potatoes is not possible.
Design features and types
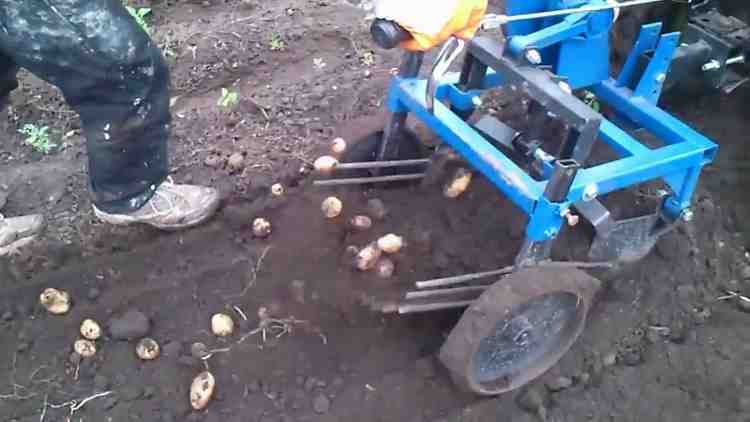
Potato digger is a mechanical device attached to a walk-behind tractor for performing work on a land plot or in the field. The main purpose is to separate the tubers from the soil, spread them on the ground area under each bush, lifting them with their teeth up. A person only has to collect potatoes in prepared buckets and bags with his hands.

Potato digger - mechanical device
The following types of units are suitable for a walk-behind tractor:
- Vibrating (rocking), functioning at the expense of a walk-behind tractor and a ploughshare for picking up potatoes. The ground is shaken back by the conveyor grate, leaving clean tubers on the surface.
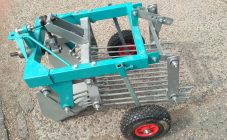
- Conveyor - the most practical model, but not suitable for light soils with low density. The digger consists of a moving conveyor with a chain device for cleaning tubers from soil and plowshares. Neva 3 is suitable as a walk-behind tractor.
- Arrowhead - simple in design with the ability to adapt to a mini-tractor, for example, "Niva". The structure does not include movable parts. Pruning the soil with tubers is done with a knife, followed by filling the earth back and laying the already clean fruits. The digger is suitable for low-density soil.
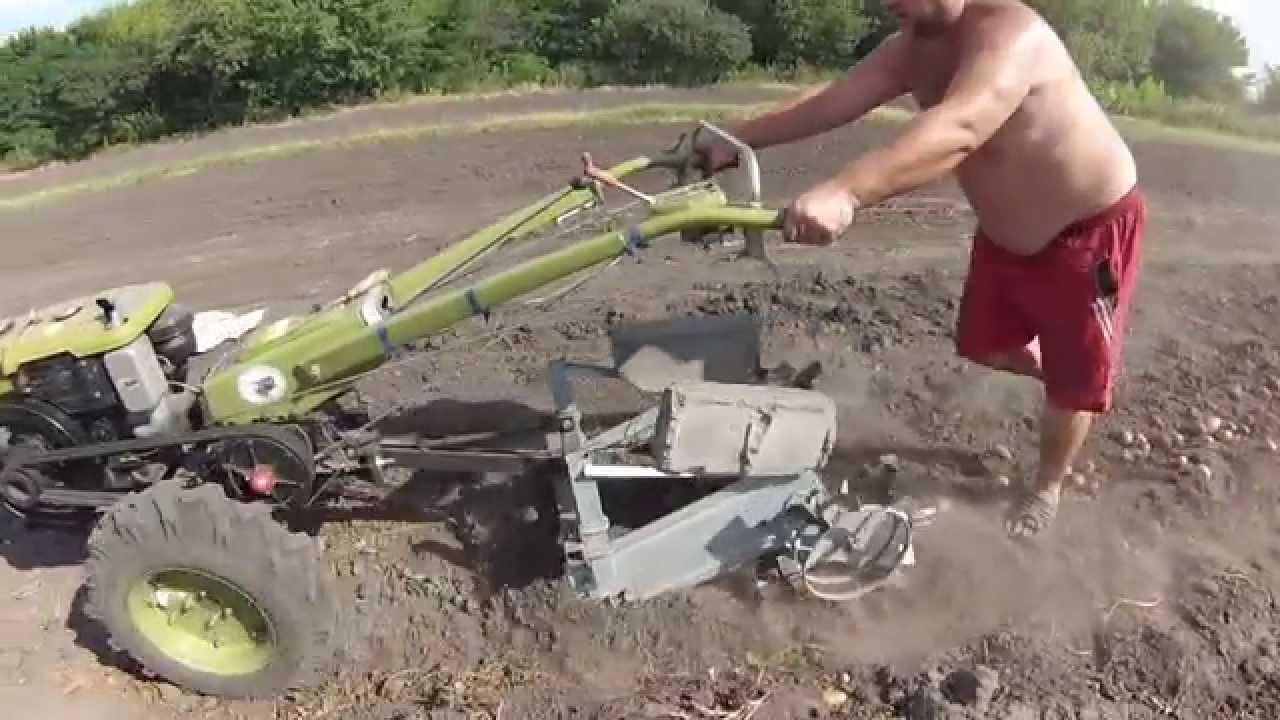
The simplest potato digger for a walk-behind tractor
The most budgetary model is a plow with rods welded to it, along which the potato tubers will rise up as the plow enters the soil. You can install the digger on a walk-behind tractor or a mini-tractor. A handy garden tool is suitable for work: an old shovel for cutting a bipod, a pitchfork - for teeth, fittings - for making rods.
The simple design does not provide for the implementation of movable units. It is enough to make it and attach it to a mini-tractor or any cultivator.The main thing is to find out the density of the soil in the garden area in order to get a working and easy-to-use home-made device at the exit.
Technical solutions for lancet
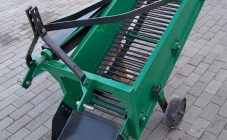
The simplest model should work flawlessly, be easily hung on the walk-behind tractor. For a small area, a compact potato digger is quite suitable, consisting of a knife, a conveyor, a pulley, a rack-belt, an adapter, a welded frame, a support wheel, and springs.
- You need to start work from the frame if it is decided to make a vibration-type lancet device. You will also need a metal opener with a thickness of 5-6 mm, a channel, corners 40 × 63 mm, steel rods.
- It is easy to make a vibrating potato digger with your own hands. To make a ploughshare, you will need to select strong steel, an iron channel 4500 mm thick, rolled metal corners, small-diameter reinforcement. Working tools - welding machine, grinder, drill, corners, level, fixing plates, steel bolts with nuts, salen blocks.
Production of a screen-type digger
Roaring Potato Digger
It consists of only 3 main elements:
- moving lattice with mechanisms;
- knife;
- metal frame.
To work you need to prepare:
- steel sheet (5 mm);
- metallic profile;
- drills for metal;
- welding machine;
- grinder, drill;
- steel wire (8 mm in diameter);
- eccentric;
- bolts;
- pencil with ruler.
Assembly steps:
- cut a metal profile for the frame;
- weld the wheel stands to the bottom of the frame;
- weld holders for the hinges to attach the screen inside the frame;
- screw in the brackets for mounting the gearbox, welding them to the frame;
- hang the screen inside the frame on the hinges;
- put the gearbox on the brackets;
- connect it to a rumble to create vibration;
- cut a knife out of steel;
- attach it to the bottom of the frame and the screen, placing it on the hinges;
- attach the wheels by putting them on the unit.
During operation, the model will not rumble, but only be constantly in an oscillating state, cutting off the soil with tubers and slightly throwing them up. They will already fall in a cleaned form behind the unit or on the side of the strip, rolling off the grate.
DIY fan potato digger
The fan is a reliable model in terms of design. For quick and high-quality digging in of potatoes, the model does not provide rotating parts, but the width of the strips for processing should be no more than 25 cm.
For manufacturing you need to prepare:
- welding machine;
- drills for metal;
- grinder;
- sheet steel for a share (4 mm thick);
- a pencil for drawing on metal;
- measuring tape;
- round steel bar.
Stages of work:
- drill 2 holes in the middle part of the share;
- weld the rods to the wide part of the knife in a fan with a divergence to the sides up to 50 cm in length;
- attach the holder to the bolts;
- attach a metal strip to the bottom of the share.
DIY potato digger
DIY potato digger
By the type of conveyor, various types of conveyor potato diggers are known. Manufacturing requires some experience in the work, as well as the study of the scheme of a similar factory machine.
You can make a tape from rods, steel mesh on a fabric basis, placing it parallel to each other. The conveyor will move as the torque is supplied from the shaft of the walk-behind tractor through the gear chain. The knife will be bolted to the frame. You can cut it out of steel sheet.
Stages of manufacturing a conveyor potato digger:
- weld a frame for a tape from corners and profiles with a square section;
- make a ploughshare knife of the desired shape from sheet steel;
- install the rollers in the frame;
- assemble a conveyor belt using steel rods and a chain;
- attach brackets for gear and reducer;
- install mechanisms and tape in the frame;
- install the knife and wheels.
Drum potato digger with your own hands
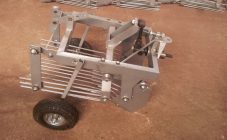
The drum potato digger is a high-performance, economical unit, which consists of a bar, steel rotating drum, a ploughshare and a frame with wheels. Suitable for harvesting potatoes from large areas.
The drum, when rotating, begins to break lumps of earth, and the potatoes move to its end, falling out onto the arable land.
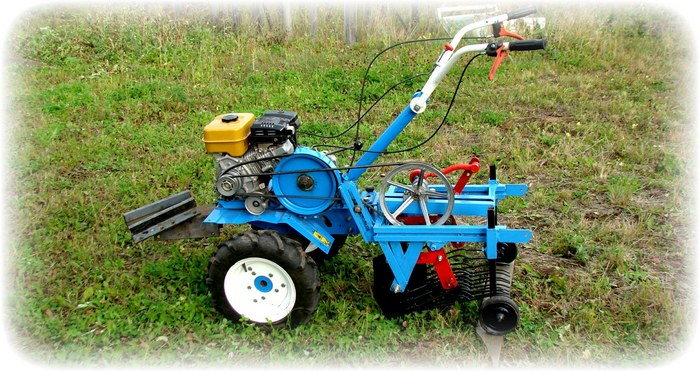
DIY vibrating digger
The vibratory digger is suitable for harvesting large areas, as it captures strips up to 40 cm and leads to a loss of yield in loose soil by no more than 10%.
The design consists of a plowshare for loosening the soil, followed by its falling, together with tubers and tops, on several mesh grates mounted on the wheels. In operation, the model begins to vibrate, the soil begins to sift, and the potato tubers separated from the tops spill out onto the cultivated clean land.

Vibrating digger
The base of the potato digger is made from a profile square pipe (40 × 40 mm), from which 4 support beams will need to be obtained. For this, corners are selected, which are welded in the form of a rectangle measuring 120 × 80 cm. Further, fasteners (square tubes) for the rods on the other side of the base are welded vertically by 1/4 of the length of the frame.
For the manufacture of a ploughshare, a metal with a thickness of 0.3 mm is selected. According to the drawing, 2 blades are cut out, tapped in the center with a hammer. Steel rods are welded to the base as a continuation of the structure. To form a pitched board, you can use rods (200 mm in diameter) from reinforcement and 120 cm in length with attachment at a distance of every 4-5 cm from each other.
DIY conveyor digger
The conveyor design is similar to the vibrational one, but the conveyor is mounted instead of the rods. This is the driving part, which will receive the soil with tubers. After that, it begins to separate the cut layer. At the exit, potato tubers are already clean, without adhering dirt.
If you additionally equip the device with a receiving hopper, where the tubers will be fed, then the conveyor will save you from manual labor in the fields during bulk harvesting of potatoes. For the arrangement of the conveyor, tubes or metal rods are selected with an arrangement parallel to each other. A fixed rim is installed in the structure chain.
In the manufacture of the conveyor, you can use a rubber cloth or steel mesh.As an electric motor that will drive the potato digger, you can take a gearbox or shaft from agricultural machinery.
Stages of work to create a conveyor model:
- make a frame from a steel profile with a rectangular section;
- then make a knife from sheet steel;
- attach rollers to the frame;
- assemble and install the conveyor belt;
- mount brackets for gear (chain) transmission and reducer;
- attach them;
- install the wheels.
Homemade transporter potato digger for walk-behind tractor
The conveyor model is quite suitable for work in extreme conditions, strong dustiness. It is a high-precision, high-speed device if properly assembled and securely assembled. The digger allows you to mechanize almost the entire assembly process if you install a receiving hopper in addition to a mini-tractor or walk-behind tractor, which will save money and manual labor when harvesting potatoes. In addition, the material at hand can always be picked up at a landfill or at home in a garage from craftsmen. Any old mechanisms will do the job.
Transporter potato digger for walk-behind tractor
Stages of work to create a conveyor unit:
- take a steel profile with a square section, weld a frame from it;
- make a ploughshare knife from sheet steel;
- install the roller in the frame for mounting the conveyor belt;
- assemble a conveyor belt from a chain, bars;
- attach brackets to the gearbox;
- install the conveyor belt and mechanisms in the frame;
- mount the wheels and the ploughshare knife to the frame.
Today, the digging of potatoes on the site with a shovel has almost become history. Modern potato diggers for a walk-behind tractor allow you to harvest much faster. At the same time, it is not necessary to buy expensive equipment for manufacturing. It is enough to make it from scrap materials quickly, simplifying the harvesting process.